You’ve just bought a decent bag of specialty beans from your local roaster, tipped them into your grinder, and now you’re staring at the adjustment dial wondering which setting to pick. Too coarse and the coffee tastes thin and sour. Too fine and you get a bitter, over-extracted mess that makes you wince. The grind size you choose has more impact on the final cup than almost any other variable — more than water temperature, more than brew time, and arguably more than the beans themselves.
After years of dialling in different brewers at home, I can tell you that understanding coffee grind sizes explained properly is the single fastest way to improve your coffee. It’s not complicated once you know what you’re aiming for, but the difference between getting it right and getting it wrong is the difference between coffee you look forward to and coffee you tolerate.
Why Grind Size Actually Matters
Coffee brewing is extraction. Hot water pulls flavour compounds out of the ground coffee, and the size of those grounds determines how quickly that happens — something the Specialty Coffee Association’s brewing guidelines cover in detail. Smaller particles have more surface area exposed to water, so they extract faster. Larger particles extract more slowly.
Get the balance wrong and you end up at one of two extremes:
- Under-extracted (grind too coarse for the method) — sour, thin, watery, lacking sweetness. The water passed through too quickly and didn’t pull enough flavour out.
- Over-extracted (grind too fine for the method) — bitter, harsh, astringent, sometimes with a dry mouthfeel. The water pulled out too much, including compounds you don’t want in the cup.
The sweet spot sits between these two. Every brew method has a different contact time between water and coffee, which is why each one needs a different grind size to hit that sweet spot. A French press steeps for four minutes, so it needs coarse grounds to avoid over-extraction. An espresso forces water through in 25-30 seconds under pressure, so it needs very fine grounds to extract enough flavour in that short window.
This is why a single grinder setting doesn’t work for everything. If you brew with more than one method — say an AeroPress on weekdays and a V60 at weekends — you’ll need to adjust your grind each time.
Coarse Grind: The Chunky End
A coarse grind looks like rough sea salt or even small pebbles. The particles are visibly distinct, and if you rub them between your fingers they feel gritty rather than powdery. This is the grind you want for immersion methods where coffee sits in water for an extended period.
Best for:
- French press — the classic coarse-grind brewer. Four minutes of steeping means you need those large particles to prevent a bitter, muddy cup
- Cold brew — steeps for 12-24 hours, so you want the coarsest setting your grinder offers. Even a medium grind will over-extract given that much contact time
- Cupping — the industry-standard tasting method uses a coarse grind with a four-minute steep
If your French press or other immersion brewer is producing coffee that tastes harsh and bitter, your grind is almost always too fine. Go coarser than you think — most people don’t go far enough.
On a Comandante hand grinder, you’re looking at around 28-32 clicks for French press. On a Baratza Encore, somewhere around 28-30. Every grinder is different, but the visual check is your best guide: if the grounds look like caster sugar, you’ve gone too fine.
Medium-Coarse Grind: The In-Between
This is where things get slightly tricky because medium-coarse sits in a no-man’s land that not many recipes call for specifically. The particles look like coarse sand — smaller than the chunky French press grind but still noticeably gritty.
Best for:
- Chemex — the thick Chemex filter slows the drawdown, so you need a slightly coarser grind than a standard pour-over to compensate
- Clever Dripper — an immersion-percolation hybrid that works well with medium-coarse
- Large-batch filter machines — if you’re making a full pot in a Moccamaster or similar, medium-coarse keeps the brew time manageable
The Chemex is the most common reason home brewers need this setting. If your Chemex is taking more than five minutes to draw down, grind coarser. If it’s rushing through in under three minutes and tasting sour, go finer. The target is around four to four and a half minutes for a two-cup brew. If you are exploring this area, our guide on Hand Grinder Technique: Getting a Consistent Grind covers the essentials.
Medium Grind: The All-Rounder
Medium grind is the default — the setting most pre-ground coffee comes in, and the one that works passably (if not perfectly) in the widest range of brewers. It looks and feels like regular sand. Not gritty, not powdery. If you could only ever use one grind size, this would be it.
Best for:
- Drip coffee machines — most standard filter machines are designed around a medium grind
- AeroPress (standard method) — the versatile AeroPress works across a wide range, but medium is a solid starting point
- Siphon brewers — the vacuum method benefits from medium grounds
Here’s the thing about medium grind, though: it’s a compromise. It works adequately in lots of methods but isn’t optimal for any of them. Pre-ground coffee from the supermarket is ground to medium because it needs to work in whatever machine you happen to own. Once you start grinding fresh and dialling in for your specific brewer, you’ll almost always end up moving away from dead-centre medium.
If you’re just getting started with a grinder and feeling overwhelmed by the options, medium is a safe place to begin. Brew a cup, taste it, and adjust from there. Sour and thin means go finer. Bitter and harsh means go coarser. Two or three adjustments and you’ll be in the right zone.
Medium-Fine Grind: The Pour-Over Sweet Spot
Medium-fine is where most pour-over methods live, and it’s the grind size that trips up more home brewers than any other. The particles look like table salt — finer than sand but still with visible individual grains. Getting this right is the difference between a clean, sweet pour-over and a disappointing one.
Best for:
- V60 — Hario’s iconic dripper needs medium-fine to hit a 2:30 to 3:30 brew time
- Kalita Wave — the flat-bottomed dripper is more forgiving than the V60 but still wants medium-fine
- AeroPress (shorter brew times) — if you’re doing a quick 1-minute AeroPress recipe, medium-fine works well
- Moka pot — the stovetop espresso maker sits somewhere between medium and medium-fine
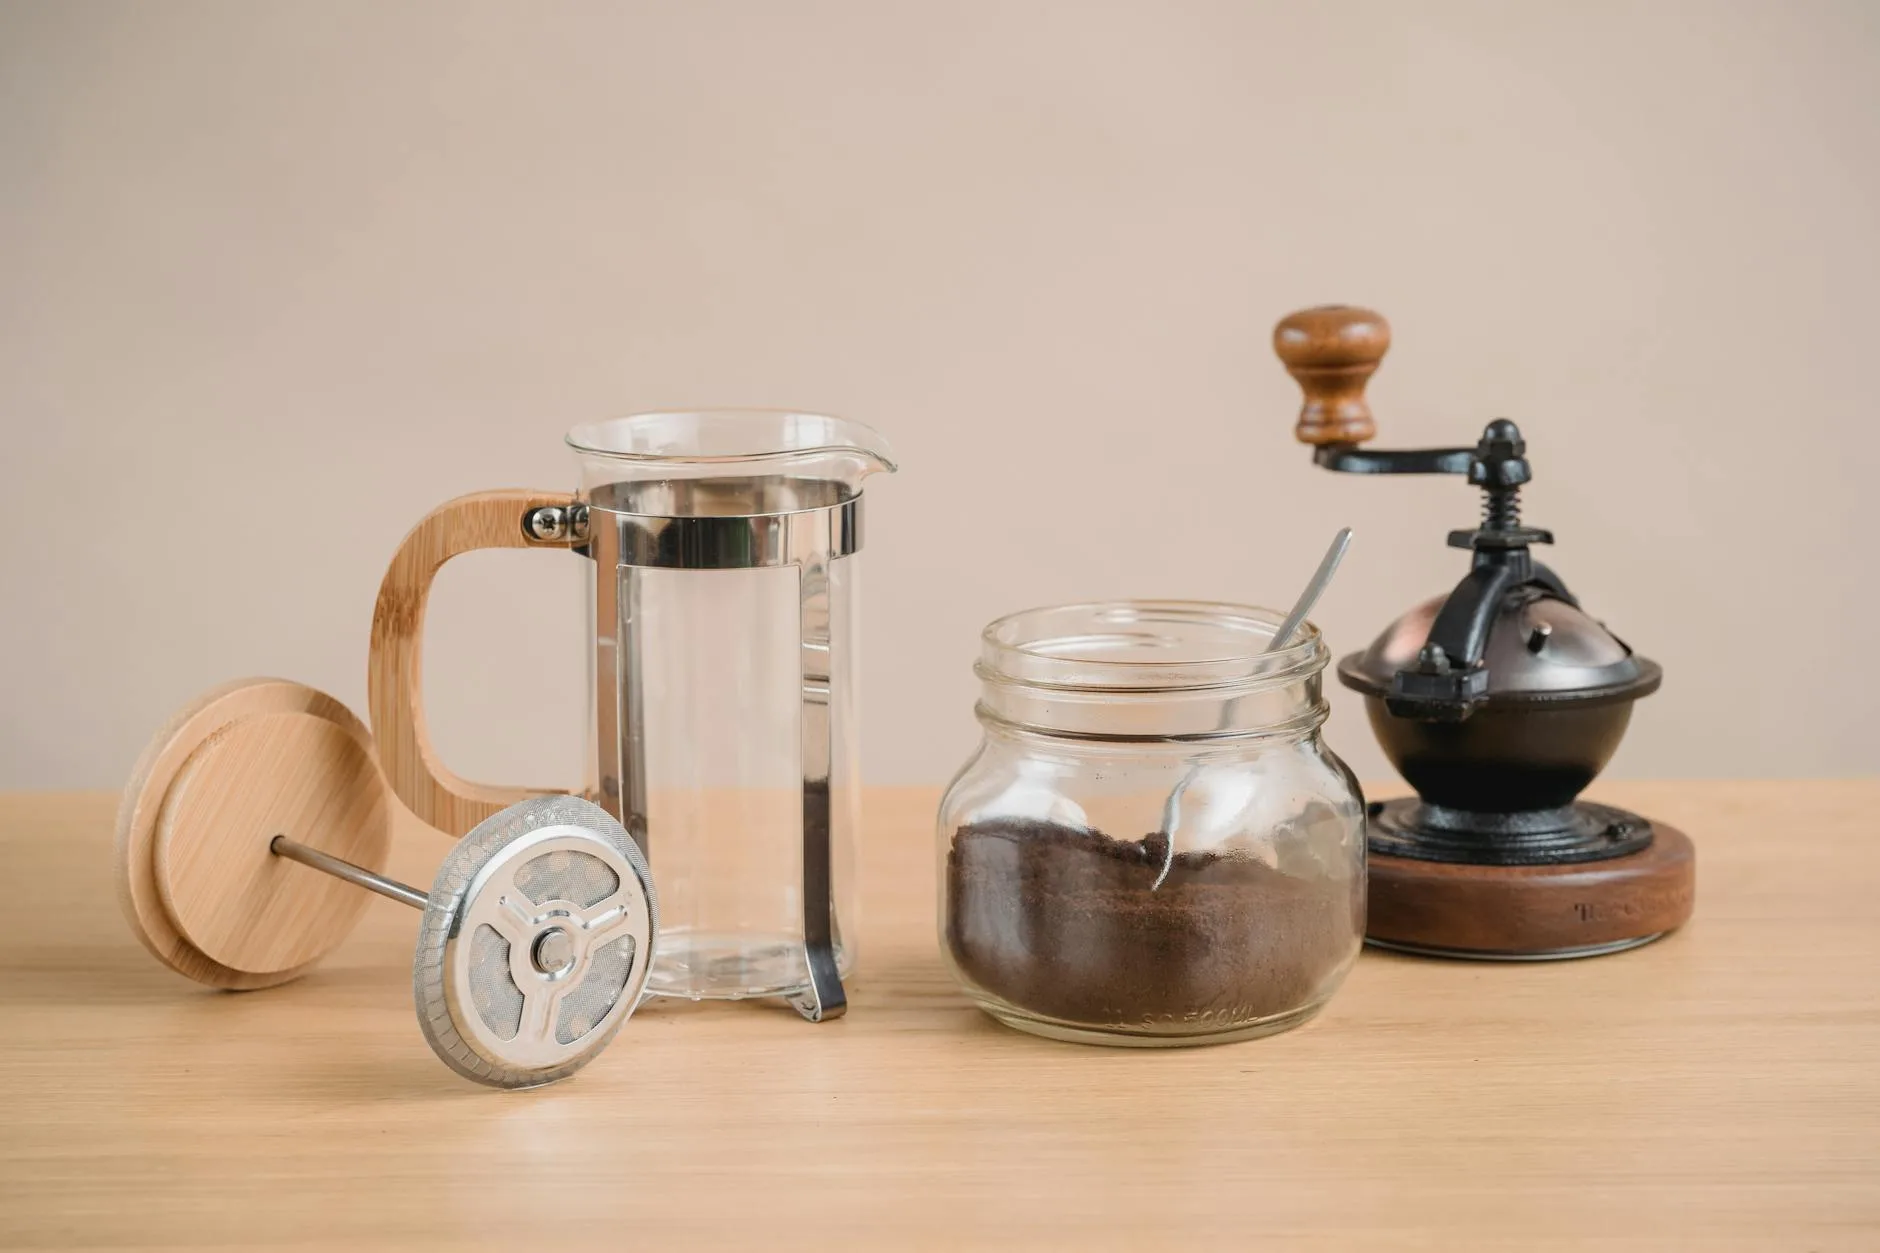
Pour-over is where grind consistency matters most. If your grinder produces a mix of fine dust and larger boulders (which cheaper blade grinders always do), those fines will over-extract while the boulders under-extract, and you’ll get a cup that’s somehow both sour and bitter at the same time. This is the main reason coffee people bang on about burr grinders — they produce uniform particles, and at medium-fine that uniformity makes the biggest difference.
A decent entry-level burr grinder like the Timemore C2 (about £60-70) or the Baratza Encore (about £140 from Bella Barista) will transform your pour-over. If you’re currently using a blade grinder or buying pre-ground, this is the single biggest upgrade you can make.
Fine Grind: Espresso Territory
Fine grind feels like flour or icing sugar between your fingers. The individual particles are barely visible, and when you press your thumb into a bed of finely ground coffee, it holds the impression like wet sand on a beach. This is where precision really starts to matter.
Best for:
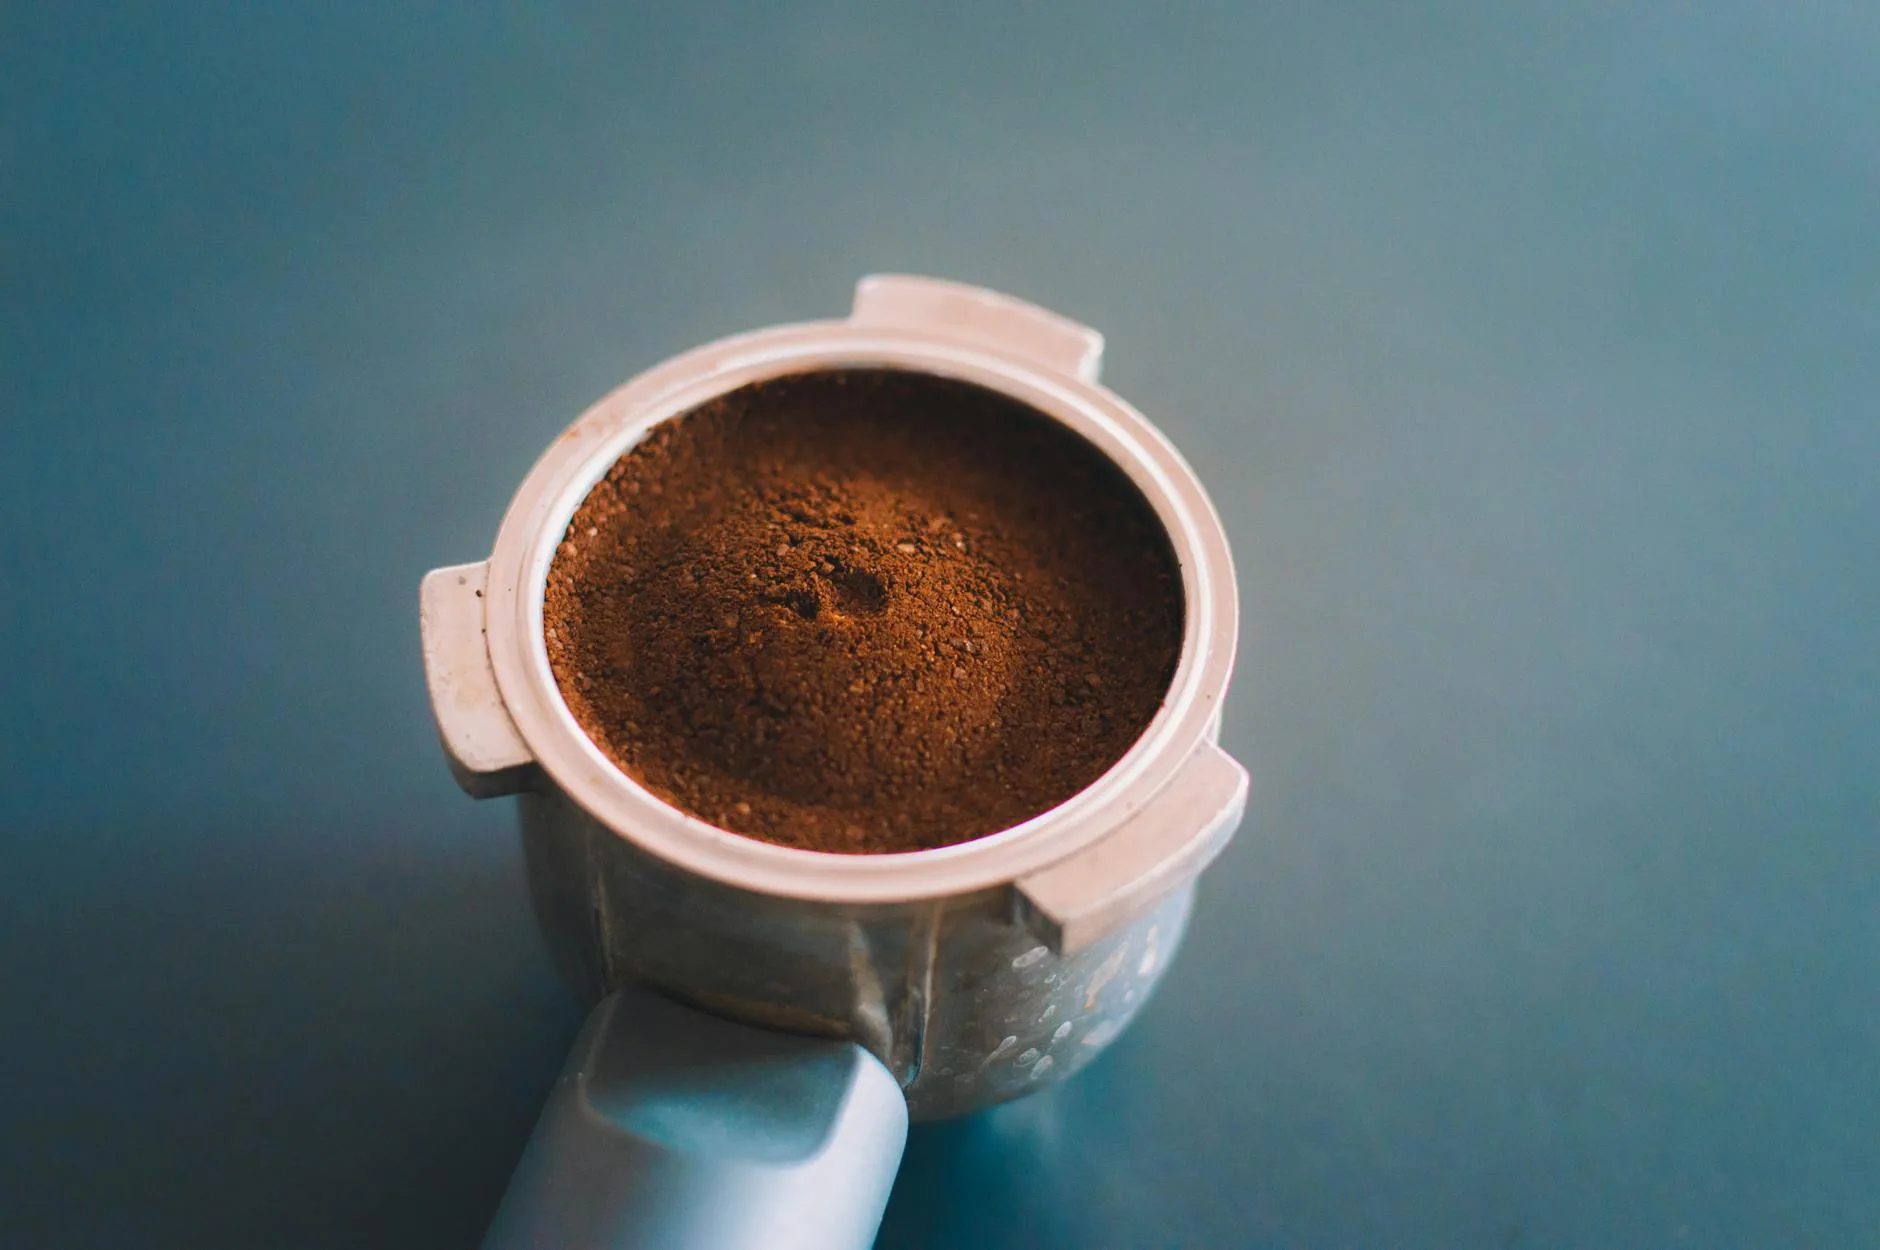
- Espresso machines — the classic use case. A shot pulls in 25-30 seconds through tightly packed fine grounds under 9 bars of pressure
- AeroPress (espresso-style recipes) — some recipes push for a very fine grind with short steep times
- Turkish coffee (medium-fine to fine) — though true Turkish needs even finer (see below)
Espresso is the most demanding brew method for grind precision. A tiny adjustment — less than a quarter-turn on most grinders — can mean the difference between a balanced 28-second shot and a gushing, sour 15-second disaster. This is why serious espresso machines need a capable grinder alongside them. Spending £400 on a machine and pairing it with a £30 grinder is like buying a sports car and filling it with chip fat.
For espresso at home, you’re looking at grinders starting around £150-200 for something adequate. The 1Zpresso JX-Pro (about £170) is a popular hand grinder choice, and the Sage Smart Grinder Pro (around £200 from Currys or John Lewis) is a solid electric option. If you’re serious about espresso, the grinder budget should match or exceed the machine budget — ask any home barista and they’ll tell you the same thing.
Extra-Fine Grind: Turkish and Beyond
The finest grind you’ll encounter is Turkish, sometimes called extra-fine or powder-fine. It has the texture of talcum powder or cocoa powder — you genuinely cannot feel individual particles. Only specific grinders can achieve this.
Best for:
- Turkish coffee (ibrik/cezve) — the grounds are boiled directly in water and not filtered out, so they need to be fine enough to settle and not feel gritty
- Greek coffee — essentially the same preparation method
Most home grinders can’t reach Turkish fineness. Standard burr grinders bottom out at espresso-fine. If you want to make Turkish coffee, you’ll need either a dedicated Turkish hand grinder (the Commandante with the Red Clix accessory can get close) or a purpose-built electric grinder. Unless Turkish coffee is your main thing, this is the one grind size most people can safely ignore.
Matching Your Grinder to Your Brew Method
The biggest mistake I see from people getting into home coffee is buying a grinder that doesn’t suit their main brew method. Here’s the honest breakdown:
- Blade grinders (£15-25 from Argos or Amazon UK) — these smash beans into random-sized pieces. Fine for a French press at a push, terrible for anything requiring consistency. If this is what you own, upgrading to a basic burr grinder will make more difference than buying better beans.
- Entry-level hand burr grinders (£30-70) — the Timemore C2 and Hario Skerton are the go-to options. Good enough for pour-over and French press. Acceptable for espresso in a pinch but you’ll fight the adjustment dial.
- Mid-range hand grinders (£100-200) — the 1Zpresso JX-Pro and Comandante C40 live here. These handle espresso properly and excel at everything else. The trade-off is the arm workout, which gets old if you’re making multiple cups.
- Entry-level electric burr grinders (£100-180) — the Baratza Encore and Wilfa Svart are the two names you’ll hear repeatedly, and for good reason. Consistent, convenient, and versatile enough for most methods except fussy espresso.
- Dedicated espresso grinders (£200-500+) — the Sage Smart Grinder Pro, Eureka Mignon series, and Niche Zero. These have the micro-adjustment needed for espresso. If espresso is your primary method, this is where you need to be.
Understanding what features matter in your coffee setup helps you avoid overspending on things that won’t improve your cup.
How to Dial In: The Practical Bit
Knowing the theory is one thing. Actually dialling in your grinder is where the real learning happens, and it’s simpler than most guides make it sound.
Start with a baseline setting for your brew method — your grinder’s manual usually suggests one, or search for “[grinder model] + [brew method] setting” and you’ll find dozens of recommendations. Brew a cup. Then taste it with these two questions:
- Is it sour, thin, or watery? → grind finer (one step at a time)
- Is it bitter, harsh, or drying? → grind coarser (one step at a time)
Make one adjustment per brew. Resist the urge to change two things at once — grind size and water temperature, for instance — because you won’t know which change made the difference.
Keep in mind that grind size isn’t the only variable. Water temperature, brew ratio (grams of coffee to grams of water), and pour technique all play a part. But grind is the one with the most dramatic effect and the one you should lock in first before fiddling with anything else.
One more thing that catches people out: coffee beans change. A bag that’s three days off roast behaves differently from the same bag at three weeks. As beans age, they degas and become easier to extract, which often means you’ll need to grind slightly coarser as the bag progresses. Don’t set your grinder once and forget it — taste every day and adjust if something’s off.
The Difference Between Cheap and Decent Grinders
I’ll be blunt about this because it’s the question everyone asks: yes, the grinder matters, and yes, the cheap one is holding you back.
A £20 blade grinder from Amazon produces a mix of boulders and dust in every batch. You can’t target a specific grind size because there’s no size control — just how long you hold the button. The result is inconsistent extraction no matter what you brew with.
A £60-70 hand burr grinder like the Timemore C2 or a £130-140 electric like the Baratza Encore produces particles that are roughly the same size. That uniformity means every ground is extracting at the same rate, which means a cleaner, sweeter, more balanced cup. It’s not subtle — the improvement from upgrading a grinder is usually bigger than the improvement from upgrading beans.
If you’re weighing up where to spend money in your coffee setup, the grinder should come before the machine every time. A great grinder paired with a basic brewer will outperform a basic grinder paired with an expensive machine. Every. Single. Time.
Storing Ground Coffee (and Why You Shouldn’t)
If you’re grinding fresh — and you should be — this section is short. Grind immediately before brewing. Coffee starts losing aromatic compounds within minutes of grinding because all that newly exposed surface area starts oxidising — research published in Nature has shown that grind size is one of the primary variables affecting extraction yield.
If you really must grind ahead (travelling, office kitchen, no grinder at your destination), store the grounds in an airtight container, push out as much air as possible, and use them within 24 hours. Beyond that, you’re losing flavour fast. Vacuum-sealed bags help, but nothing beats grinding to order.
Pre-ground coffee from the supermarket is months old and stale before you open the bag. It works, and if that’s your current setup there’s no shame in it. But if you’ve read this far, you’re probably ready for the next step — and a basic grinder plus fresh beans from a UK roaster will change everything about your morning cup.
Grind size affects extraction, but the coffee itself still matters. Our explainer on fair trade vs direct trade coffee helps make sense of sourcing claims on the bag.
Frequently Asked Questions
Does an expensive grinder really make better coffee? Up to a point. The jump from blade to a £40 burr grinder is massive. Between £100-300, improvements are real but incremental. Above £500, you pay for workflow features rather than dramatic flavour gains.
How often should I clean my coffee grinder? Brush out retained grounds after every session. Deep-clean burrs monthly — remove them, scrub with a stiff brush, wipe the chamber. Coffee oils go rancid and taint fresh grinds.
Can I use the same grinder for espresso and filter? You can, but switching settings wastes beans re-dialling each time. If you brew both regularly, dedicated grinders save time and coffee.
What should I check first with Coffee Grind Sizes Explained: Coarse to Fine? Start with the real use case, then check size, compatibility, running costs and maintenance. A product that looks good on paper can still be the wrong fit if it does not suit the room, routine or budget.
How do I avoid wasting money on Coffee Grind Sizes Explained: Coarse to Fine? Avoid buying on one headline feature alone. Compare the practical details, read the warranty or returns terms, and choose the option that solves your main problem rather than the one with the longest specification list.