You’re on the Sage website staring at six different espresso machines, and each one has a feature list that reads like a spacecraft spec sheet. After spending months testing machines across every price bracket, our best espresso machines under £500 guide cuts through the jargon with tested picks. Specialty Coffee Association-approved features like PID temperature control. Thermojet heating. Pre-infusion. Low-pressure pre-infusion. Automatic microfoam. Volumetric dosing. Dose control grinding. At some point you just want someone to say: which of these things actually makes better coffee, and which ones are marketing fluff designed to justify a higher price tag?
That’s what this is. Every common espresso machine feature, explained in plain terms, with an honest assessment of whether it’s worth paying extra for. Some of these genuinely transform your coffee. Others are nice touches that don’t affect the cup. And a few are solutions to problems that don’t exist at the home level.
PID Temperature Control
What it does: PID stands for Proportional-Integral-Derivative — a control algorithm that maintains the brew boiler at a precise, stable temperature. Without PID, the boiler cycles on and off around a target temperature using a simple thermostat (called a pressostat), creating temperature swings of 5-10°C between heating cycles.
Why it matters: Espresso extraction is sensitive to temperature. A couple of degrees hotter and you get more bitterness and body. A couple of degrees cooler and you get more acidity and brightness. With a pressostat, the temperature at the moment you pull a shot depends on where the boiler happens to be in its heating cycle — which is essentially random. With PID, the temperature is consistently what you set it to, within about ±1°C.
Does it make a real difference? Yes — this is one of the most meaningful upgrades on any espresso machine. The consistency alone is worth it: the same beans, the same grind, the same dose produces the same shot every morning instead of varying unpredictably. And the ability to adjust brew temperature by a degree or two lets you tune extraction for different beans — hotter for darker roasts that need more body, cooler for light roasts that are already packed with acidity.
The verdict: Essential. If you’re choosing between two machines and one has PID and the other doesn’t, pick the PID machine every time. Most machines above £400-500 include it. Below that, it’s rare.
UK machines with PID at each tier: – Budget (£300-500): Sage Bambino Plus (about £400), Lelit Anna PID (about £380-420) – Mid-range (£500-1,000): Lelit Mara X (about £550-650), Sage Barista Pro (about £600-700) – Premium (£1,000+): Profitec Pro 600 (about £1,700), Lelit Bianca V3 (about £1,300)
Pre-Infusion
What it does: Before the pump ramps up to full 9-bar pressure, the machine wets the coffee puck at low pressure for a few seconds. This allows the grounds to soak evenly before the main extraction begins.
Why it matters: Without pre-infusion, the full force of 9-bar pressure hits a dry puck. If there are any weak spots or tiny channels in the coffee bed, water blasts through them (called channelling), creating uneven extraction — some grounds over-extract (bitter) while others under-extract (sour). Pre-infusion evens out the puck, sealing small gaps and ensuring water flows through the entire bed more uniformly.
Types of pre-infusion:
- Passive pre-infusion (E61 group head): The E61 thermosyphon design naturally floods the puck at line pressure (about 2-3 bar) before the pump kicks in. It’s gentle and effective, and it happens automatically. Every E61 machine does this — you don’t pay extra for it.
- Active/electronic pre-infusion: The machine runs the pump at a reduced pressure (usually 3-4 bar) for a programmed duration before ramping to full pressure. More controllable than passive pre-infusion. Sage/Breville machines and some prosumer machines (Lelit Bianca, Decent DE1) offer this.
- Line pressure pre-infusion: On plumbed-in machines connected to mains water, the mains pressure (about 2-3 bar) pre-infuses the puck before the pump engages. Similar to E61 passive pre-infusion.
Does it make a real difference? Yes, but the magnitude depends on your grinder and puck prep. If you’re using a quality grinder (Eureka Mignon, Niche Zero, or better) and distributing your grounds properly, pre-infusion improves extraction evenness noticeably. If you’re using a blade grinder or a cheap pressurised basket, pre-infusion can’t fix fundamental inconsistencies in the grind.
The verdict: Worth having, but not worth obsessing over. Passive pre-infusion from an E61 group head is perfectly adequate for most home baristas. Electronic pre-infusion with adjustable timing and pressure is a nice bonus on higher-end machines, letting you fine-tune for different beans. But it’s not a reason alone to spend £500 more.
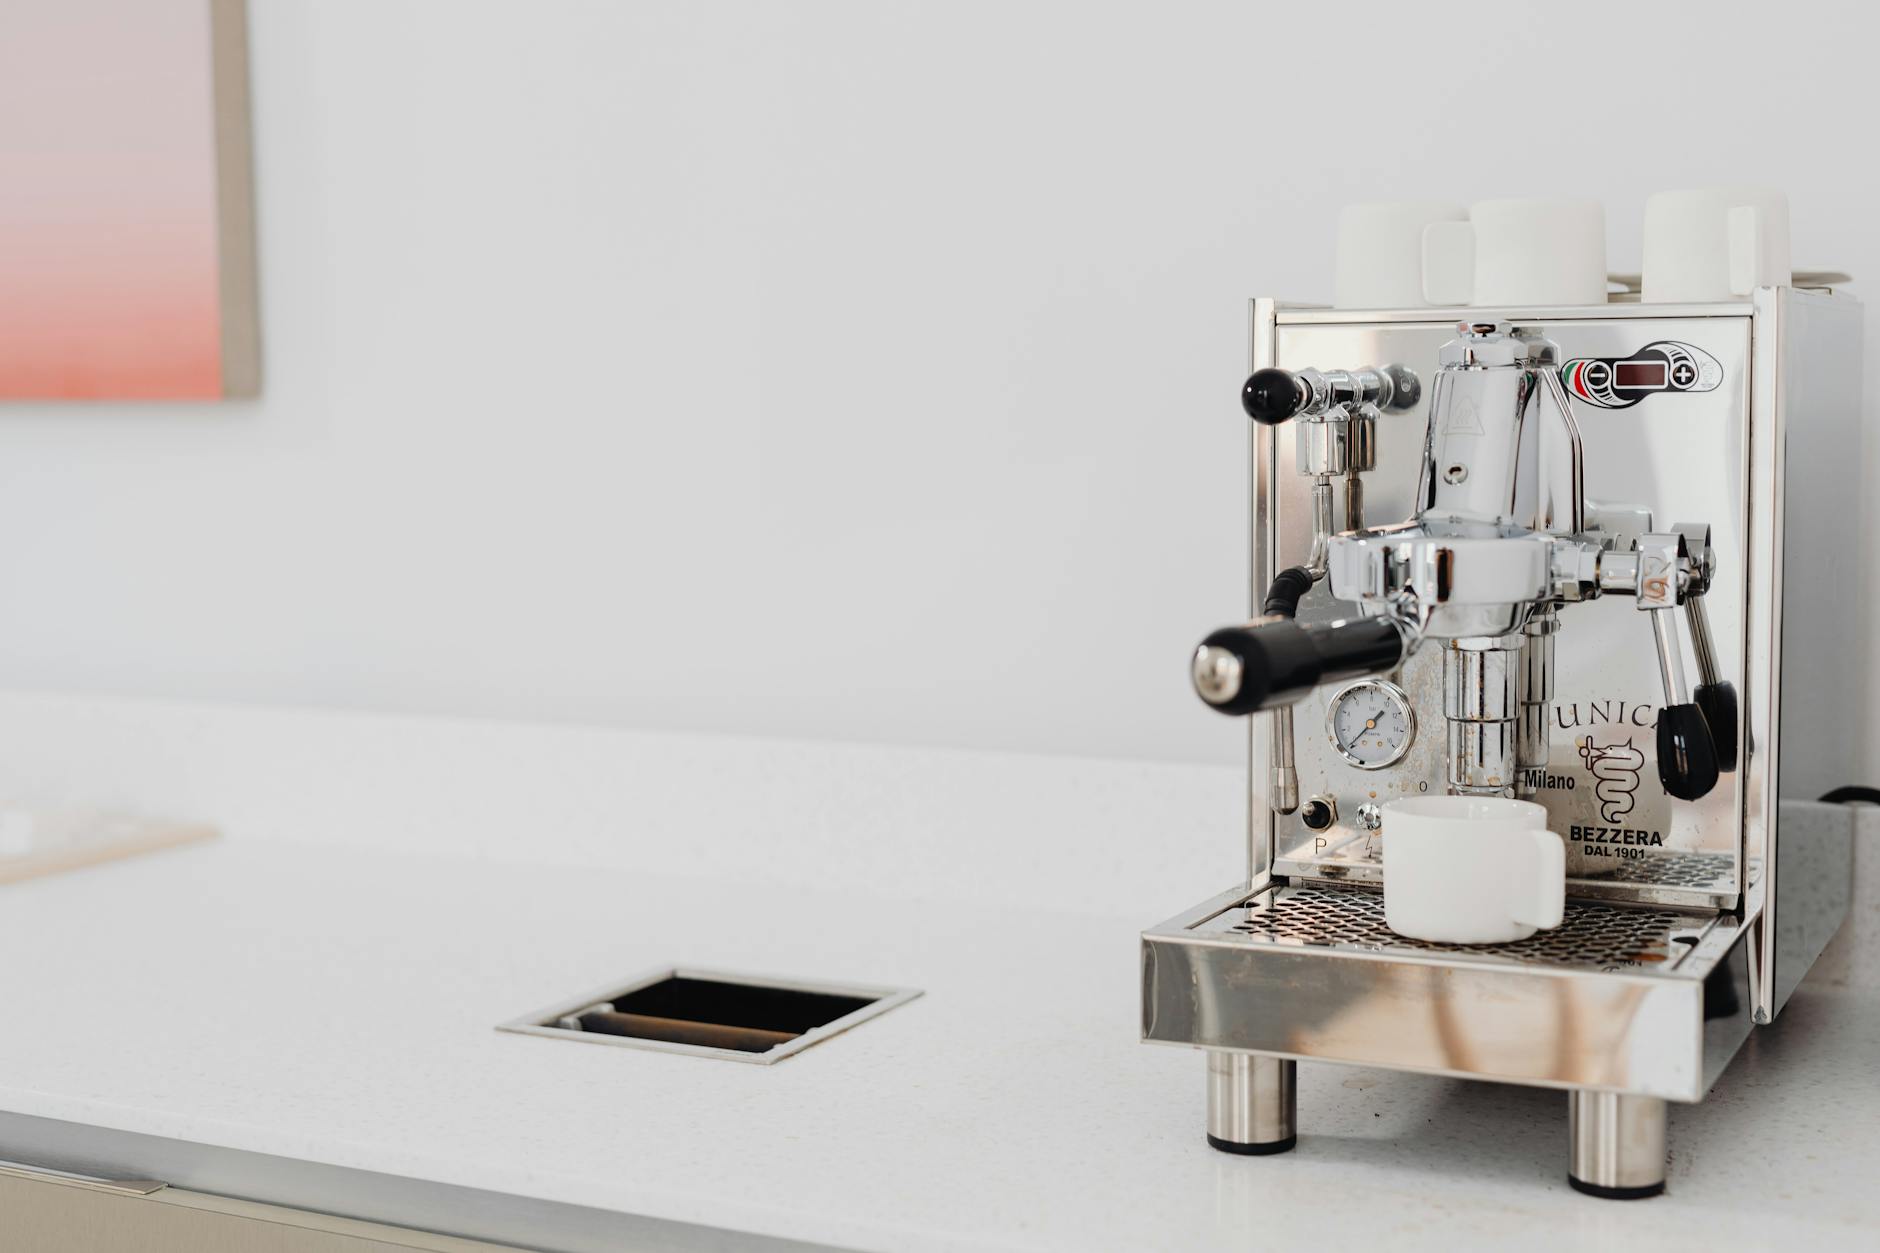
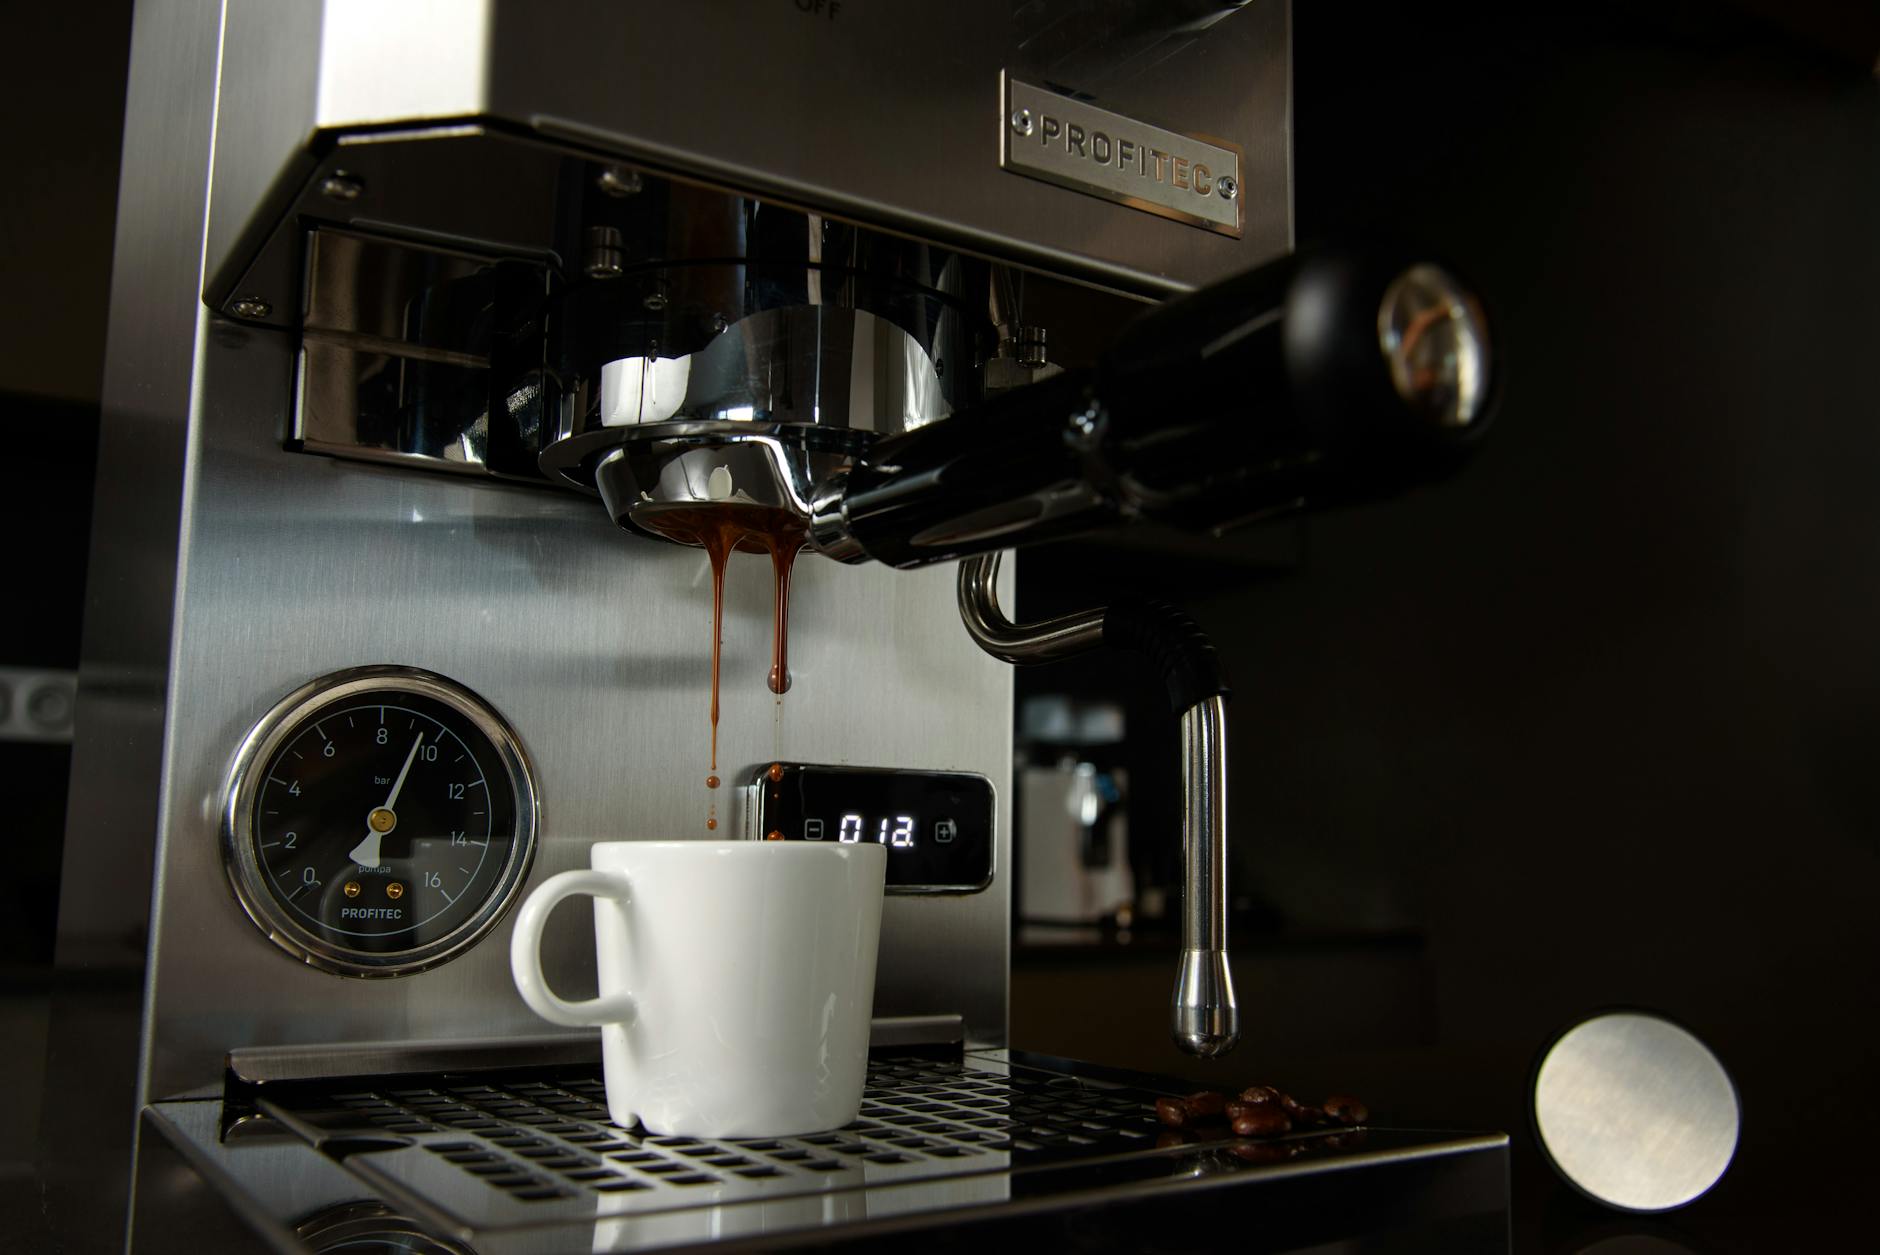
Pressure Gauge
What it does: A pressure gauge (manometer) on the front of the machine shows the pump pressure during extraction, typically reading 0-15 bar.
Why it matters — or doesn’t: In theory, you want to see 9 bar during extraction. If the gauge reads notably higher, your grind is too fine (the water can’t get through the puck). If it reads lower, your grind is too coarse (water flows through too easily). So the gauge gives you feedback on whether your grind is dialled in.
In practice, though, most home baristas learn to judge extraction by taste and timing far more than by watching a gauge. A well-extracted espresso takes about 25-30 seconds and tastes balanced. You can see this on a scale with a timer — you don’t need a pressure gauge to tell you.
The gauge is also less informative than people expect. It shows pump pressure, not the actual pressure at the puck (which is lower due to resistance in the system). And the cheap gauges on many machines aren’t particularly accurate. High-end machines like the Decent DE1 have digital pressure sensors that show real puck pressure — that’s really useful data. A bouncing analogue needle on a £400 machine? Less so. If you are exploring this area, our guide on Single Dose Grinding: What It Is and Why It Matters covers the essentials.
The verdict: Nice to have, not worth paying extra for. If two otherwise identical machines differ only in having a gauge, pick whichever’s cheaper. If you’re buying a prosumer machine above £600, most come with one anyway.
Volumetric Dosing
What it does: The machine automatically stops the pump after a pre-set volume of water has passed through the puck. You program it (say, 36ml of espresso), press the button, and walk away. The shot stops itself.
Why it matters: Consistency. Instead of manually timing shots and stopping the pump (which requires watching and pressing a button at the right moment), the machine handles it. Pull the same volume every time, get the same ratio every time.
The reality for home use: This is more useful in a cafe where baristas are making 200 shots a day and can’t babysit each one. At home, you’re making one to four shots a day and you’re standing right there watching. Stopping the pump manually takes one button press and about one second of attention.
The other issue: volumetric dosing measures water into the puck, not espresso out of it. The amount of liquid in your cup depends on the dose, grind, and how much water the grounds absorb — which changes as beans age. A gravimetric (weight-based) system, like on the Decent DE1 or the La Marzocco Linea Mini with the optional scales, is far more accurate. But those are in the £2,000+ bracket.
The verdict: A convenience feature, not a quality feature. Won’t improve your espresso. Useful if you’re frequently distracted (small children, phone calls) and tend to let shots run too long. Most Sage/Breville machines include it as standard, which is a nice touch but shouldn’t be a deciding factor.
Thermoblock vs Thermocoil vs Boiler
What it does: These are different ways of heating water.
- Thermoblock: Water passes through a heated metal block with a channel cut into it. Heats water on demand — no stored hot water. Found in cheaper machines (Delonghi, some Sage models).
- Thermocoil (Sage’s “ThermoJet”): A more advanced version of the thermoblock with a coiled channel for better heat transfer. Sage uses this in the Bambino and Barista Express range. Heats to brew temperature in about 3 seconds.
- Traditional boiler: A tank of water kept at temperature. Larger thermal mass means more stable temperature. Found in all prosumer and commercial machines.
Does it matter? The heating method affects two things: heat-up time and temperature stability.
Thermoblocks and thermocoils heat up almost instantly (3-30 seconds), which is brilliant for convenience. You decide you want coffee, press a button, and you’re pulling a shot in under a minute. A traditional boiler takes 10-25 minutes from cold.
But thermoblocks have less thermal mass, so the temperature can fluctuate during extraction as the block cycles its heating element. Thermocoils (like Sage’s ThermoJet) are better but still less stable than a large brass or stainless steel boiler holding a litre or more of water at a constant temperature.
The verdict: For quick, convenient espresso (especially in a busy household), thermocoil/ThermoJet machines like the Sage Bambino Plus are excellent. The temperature stability is good enough for most palates. For the best possible temperature stability and the ability to brew and steam simultaneously without compromise, a traditional boiler machine wins — but you pay for it in warm-up time and price.
Steam Wand Type
What it does: The steam wand froths and textures milk for lattes, flat whites, and cappuccinos. But not all steam wands are equal. You might also find our Bean-to-Cup vs Espresso Machine: Which Is Right for You? guide useful here.
- Manual steam wand: A simple pipe that outputs steam. You control the frothing by positioning the wand tip and jug yourself. Found on prosumer machines and some Sage models (the Barista Express, for instance).
- Automatic/assisted steam wand: Sage’s “Auto Steam” on the Oracle series, or Jura’s automated milk systems. The machine controls the steam and produces microfoam automatically — you just hold the jug in place (or don’t even do that on fully automatic machines).
- Panarello wand: A plastic sleeve over the steam tip that sucks in air automatically. Found on cheap machines. Produces chunky, bubbly foam — not silky microfoam.
Which matters?
Learning to steam milk manually takes practice — maybe 10-20 jugs before you’re consistently getting silky microfoam. But once you’ve learned, a manual wand gives you total control and produces better-textured milk than any automated system. It’s a skill worth learning if you care about latte art or truly silky flat whites.
Automated steaming (Sage Oracle, Jura) is convenient but produces milk that’s “good enough” rather than excellent. If you’re making lattes for the family and nobody cares about microfoam quality, it saves time. If you want proper coffee-shop-quality milk texture, learn manual steaming.
Panarello wands are basically useless for anyone who cares about milk texture. If a machine has one, check whether it’s removable — sometimes there’s a proper steam tip underneath.
The verdict: A manual steam wand is better in every way except convenience. If you’re spending over £500 on a machine, you should be steaming manually. Below that, automated options are a fair compromise.
Grinder Integration (Built-In Grinders)
What it does: Machines like the Sage Barista Express, Barista Pro, and Oracle have a built-in conical burr grinder. You load beans into the hopper, the machine grinds and doses directly into the portafilter.
The appeal: One machine, one workflow, less counter space. No separate grinder to buy, which saves £150-400 depending on the standalone grinder.
The reality: Built-in grinders are a compromise. The burrs are typically 54mm conical — adequate but not exceptional. The grind adjustment is usually stepped (click-click between settings) rather than stepless, which means you sometimes can’t get exactly the grind size you want for a particular bean. You end up between two settings, one slightly too coarse and one slightly too fine.
A standalone grinder at the same price point (or even cheaper) typically outperforms an integrated one. The Eureka Mignon Notte (about £170-200) or the Fellow Opus (about £150) both grind more consistently than the built-in grinder on the Barista Express. And you can upgrade the grinder independently later without replacing the whole machine.
The verdict: Built-in grinders are fine for people who want simplicity and don’t want to fuss with a separate appliance. But if you’re serious about espresso quality and willing to have two machines on your counter, buy the machine and grinder separately. You’ll get better results and more flexibility. The Sage Bambino Plus (about £400) paired with a Eureka Mignon Notte (about £200) outperforms the Sage Barista Express (about £550-650) despite costing roughly the same.
Shot Timer
What it does: Displays how many seconds have elapsed since you started pulling a shot.
Why it matters: Extraction time is one of the key variables in espresso. A standard double shot should take roughly 25-32 seconds from pump start to finish. Too fast (under 20 seconds) usually means the grind is too coarse — the espresso will taste thin and sour. Too slow (over 35 seconds) usually means the grind is too fine — expect bitterness and astringency. We cover this in more detail in our Coffee Machine Water Filters: Do They Make a Difference? piece.
A built-in timer saves you pulling out your phone or buying a separate timer. It’s right there on the machine.
The verdict: Actually useful. Not a reason to choose one machine over another, but a nice feature when included. If your machine doesn’t have one, buy a cheap digital kitchen timer (about £3-5 from Amazon UK) or use scales with a built-in timer, which you should probably have anyway.
Programmable Temperature
What it does: Lets you adjust the brew water temperature, usually in 1°C increments. Related to PID (which maintains the set temperature), but this is about the ability to change what that temperature is.
Why it matters: Different coffees extract best at different temperatures. Lighter roasts, which are denser and harder to extract, often benefit from higher temperatures (94-96°C). Darker roasts, which extract easily and can become bitter quickly, often taste better at slightly lower temperatures (91-93°C).
If you buy the same beans every month, you’ll find your ideal temperature once and leave it. If you rotate through different roasters and origins (as many speciality coffee drinkers do), being able to nudge the temperature up or down by 2°C is really useful.
The verdict: Worth having for anyone buying speciality beans. Unnecessary if you’re using the same supermarket beans consistently. Most machines with PID include temperature adjustment, so you’re not usually paying extra for it — it’s part of the PID package.
Low Pressure / Slow Pre-Infusion
What it does: An extension of pre-infusion where the machine ramps pressure very slowly (over 5-10 seconds or more) before reaching full extraction pressure. Sometimes called “bloom” or “flow control” pre-infusion.
Why it matters: Long, slow pre-infusion allows CO₂ to escape from fresh coffee (which can disrupt extraction) and lets water saturate the puck evenly. It’s particularly beneficial for very fresh beans (less than two weeks from roast) and light roasts. The result is a sweeter, more balanced shot with less channelling.
The reality: True flow control (machines like the Lelit Bianca with its paddle, or the Decent DE1) lets you manually ramp pressure from zero to nine bar over any timeline you choose. It’s the feature that’s gotten the speciality coffee world most excited in recent years. But it requires significant experimentation to use well — you’re essentially designing a pressure recipe for each coffee.
Automated slow pre-infusion (as on some Sage machines) is a simpler version that gives you some of the benefit without the complexity.
The verdict: Flow control and slow pre-infusion are truly exciting for enthusiasts. If you’re already deep into the espresso hobby — weighing doses to 0.1g, timing shots, buying from speciality roasters — you’ll love having this. If you just want a good flat white every morning, it’s complexity you don’t need.
What to Actually Spend Your Money On
Here’s the honest hierarchy of what improves espresso quality at home, from most impactful to least:
- Grinder quality — This matters more than the espresso machine. A £200 grinder with a £300 machine makes better espresso than a £100 grinder with a £400 machine. Always.
- Fresh, quality beans — Speciality-roasted beans within 4-6 weeks of roast date. Buy from a UK roaster (Squaremile, Hasbean, Assembly, Origin, Dark Arts — there are hundreds of good ones). Supermarket beans are stale before they hit the shelf.
- PID temperature control — Consistency is king.
- Scales with a timer — Measuring your input (dose) and output (yield) by weight. Timemore Black Mirror scales (about £40-55 from Amazon UK) are the home barista standard.
- Pre-infusion — Improves extraction evenness.
- Manual steam wand — For proper milk texture.
- Everything else — Nice but not essential.
Our Machine Picks by Budget
£300-400 — The Smart Start: Sage Bambino Plus (about £350-400) + separate grinder. The Bambino Plus has ThermoJet heating (3-second heat-up), automatic steam, and PID. Pair it with a Eureka Mignon Notte or Sage Smart Grinder Pro (about £170-200) for a setup that punches well above its total price.
£500-800 — The Enthusiast Setup: Lelit Mara X (about £550-650) + Eureka Mignon Specialità (about £300-350). The Mara X’s brew-priority mode gives you dual-boiler-like temperature stability in a heat exchanger body. The Specialità’s 55mm flat burrs produce an even, consistent grind. This combo makes espresso that most people can’t distinguish from machines costing twice as much.
£1,000-1,500 — Serious Home Barista: Lelit Bianca V3 (about £1,200-1,400) + Niche Zero (about £250-300). The Bianca gives you dual boiler stability, flow control, and a beautiful build. The Niche Zero is a single-dose conical burr grinder that produces zero retention and grinds directly into the portafilter. This is the setup where most home baristas stop upgrading — it does everything.
£2,000+ — Endgame Territory: Profitec Pro 600 (about £1,700-1,900) or Decent DE1 (about £2,300-2,800) + Eureka Mignon XL (about £450-500) or Lagom P64 (about £700-900). At this point you’re making coffee that’s as good as it gets outside of a commercial setup. Buy whichever machine suits your style — the Profitec if you want a classic Italian machine, the Decent if you want digital precision and endless experimentation.
All of these are available from UK stockists: Bella Barista, Coffee Hit, Black Cat Coffee, Currys (for Sage), and John Lewis. Support your local speciality retailer where possible — the advice they offer is worth more than the occasional Amazon discount.
Frequently Asked Questions
How long does it take to learn to make good espresso? Most people pull decent shots within 2-3 weeks of daily practice. The basics — dose, grind, tamp, timing — are straightforward. You will make better coffee than most cafes within a month.
Is an espresso machine worth it for one cup a day? At £3-4 per takeaway coffee, a £400 setup pays for itself in 6-8 months. The bigger question is whether you enjoy the ritual. If not, a bean-to-cup gives quality results with less effort.
What is the most important factor for good espresso? The grinder. A great grinder with a modest machine beats an expensive machine with a poor grinder every time. Budget at least half your total setup cost on the grinder.
What should I check first with Coffee Machine Features Explained: What Actually Matters? Start with the real use case, then check size, compatibility, running costs and maintenance. A product that looks good on paper can still be the wrong fit if it does not suit the room, routine or budget.
How do I avoid wasting money on Coffee Machine Features Explained: What Actually Matters? Avoid buying on one headline feature alone. Compare the practical details, read the warranty or returns terms, and choose the option that solves your main problem rather than the one with the longest specification list.