You bought an AeroPress because someone at work raved about it, and now it’s sitting on your kitchen counter looking like a giant syringe while you wonder what ratio of coffee to water you’re supposed to use. The good news: the AeroPress is one of the most forgiving brewers you can own. The even better news: once you nail a couple of basic recipes, it produces coffee that rivals pour-over setups costing five times as much.
In This Article
- What Makes the AeroPress Different
- Essential Equipment You Need
- The Standard Method: Your First Recipe
- The Inverted Method Explained
- AeroPress Recipes for Different Tastes
- Water Temperature and Why It Matters
- Grind Size: The Single Biggest Variable
- How to Dial In Your AeroPress
- Common AeroPress Mistakes
- AeroPress vs Other Brew Methods
- Cleaning and Maintenance
- AeroPress Accessories Worth Buying
- Frequently Asked Questions
What Makes the AeroPress Different
The AeroPress brews coffee using a combination of immersion (steeping, like a French press) and pressure (pushing water through the grounds, like an espresso machine — sort of). That hybrid approach is what gives AeroPress coffee its distinctive character: cleaner than a French press, more body than a pour-over, and faster than both.
The Pressure Factor
When you press the plunger down, you’re generating about 0.35-0.7 bar of pressure. That’s nowhere near espresso pressure (9 bar), but it’s enough to extract flavours that gravity alone misses. The result is a concentrated, smooth cup with very low bitterness — assuming you don’t over-extract.
Why It’s So Popular in the UK
The British Coffee Association reports that UK coffee consumption has grown steadily year on year, and the specialty coffee scene in particular has exploded. The AeroPress sits perfectly in that space: under £35, no electricity needed, makes one excellent cup at a time, and fits in a kitchen drawer. It’s also the brewer of choice for travelling — we’ve taken ours to Airbnbs, campsites, and hotel rooms without a second thought.
AeroPress Original vs Clear vs Go
- AeroPress Original — the classic grey polypropylene version, about £30-35. Still the standard
- AeroPress Clear — same design in transparent Tritan plastic, about £35. Looks nicer, functionally identical
- AeroPress Go — compact travel version with a built-in mug/carrying case, about £35. Slightly smaller capacity (makes about 230ml vs 250ml). The mug it comes with is small but surprisingly decent for travel
- AeroPress XL — double the capacity of the original, about £45. Good for making two cups at once or a stronger concentrate
All versions use the same filter papers and brew the same way. Pick based on whether you’ll travel with it.
Essential Equipment You Need
The AeroPress itself comes with everything for a basic brew: the chamber, plunger, filter cap, scoop, stirrer, and a pack of paper filters. But for consistently good results, you’ll want a few extras:
The Non-Negotiables
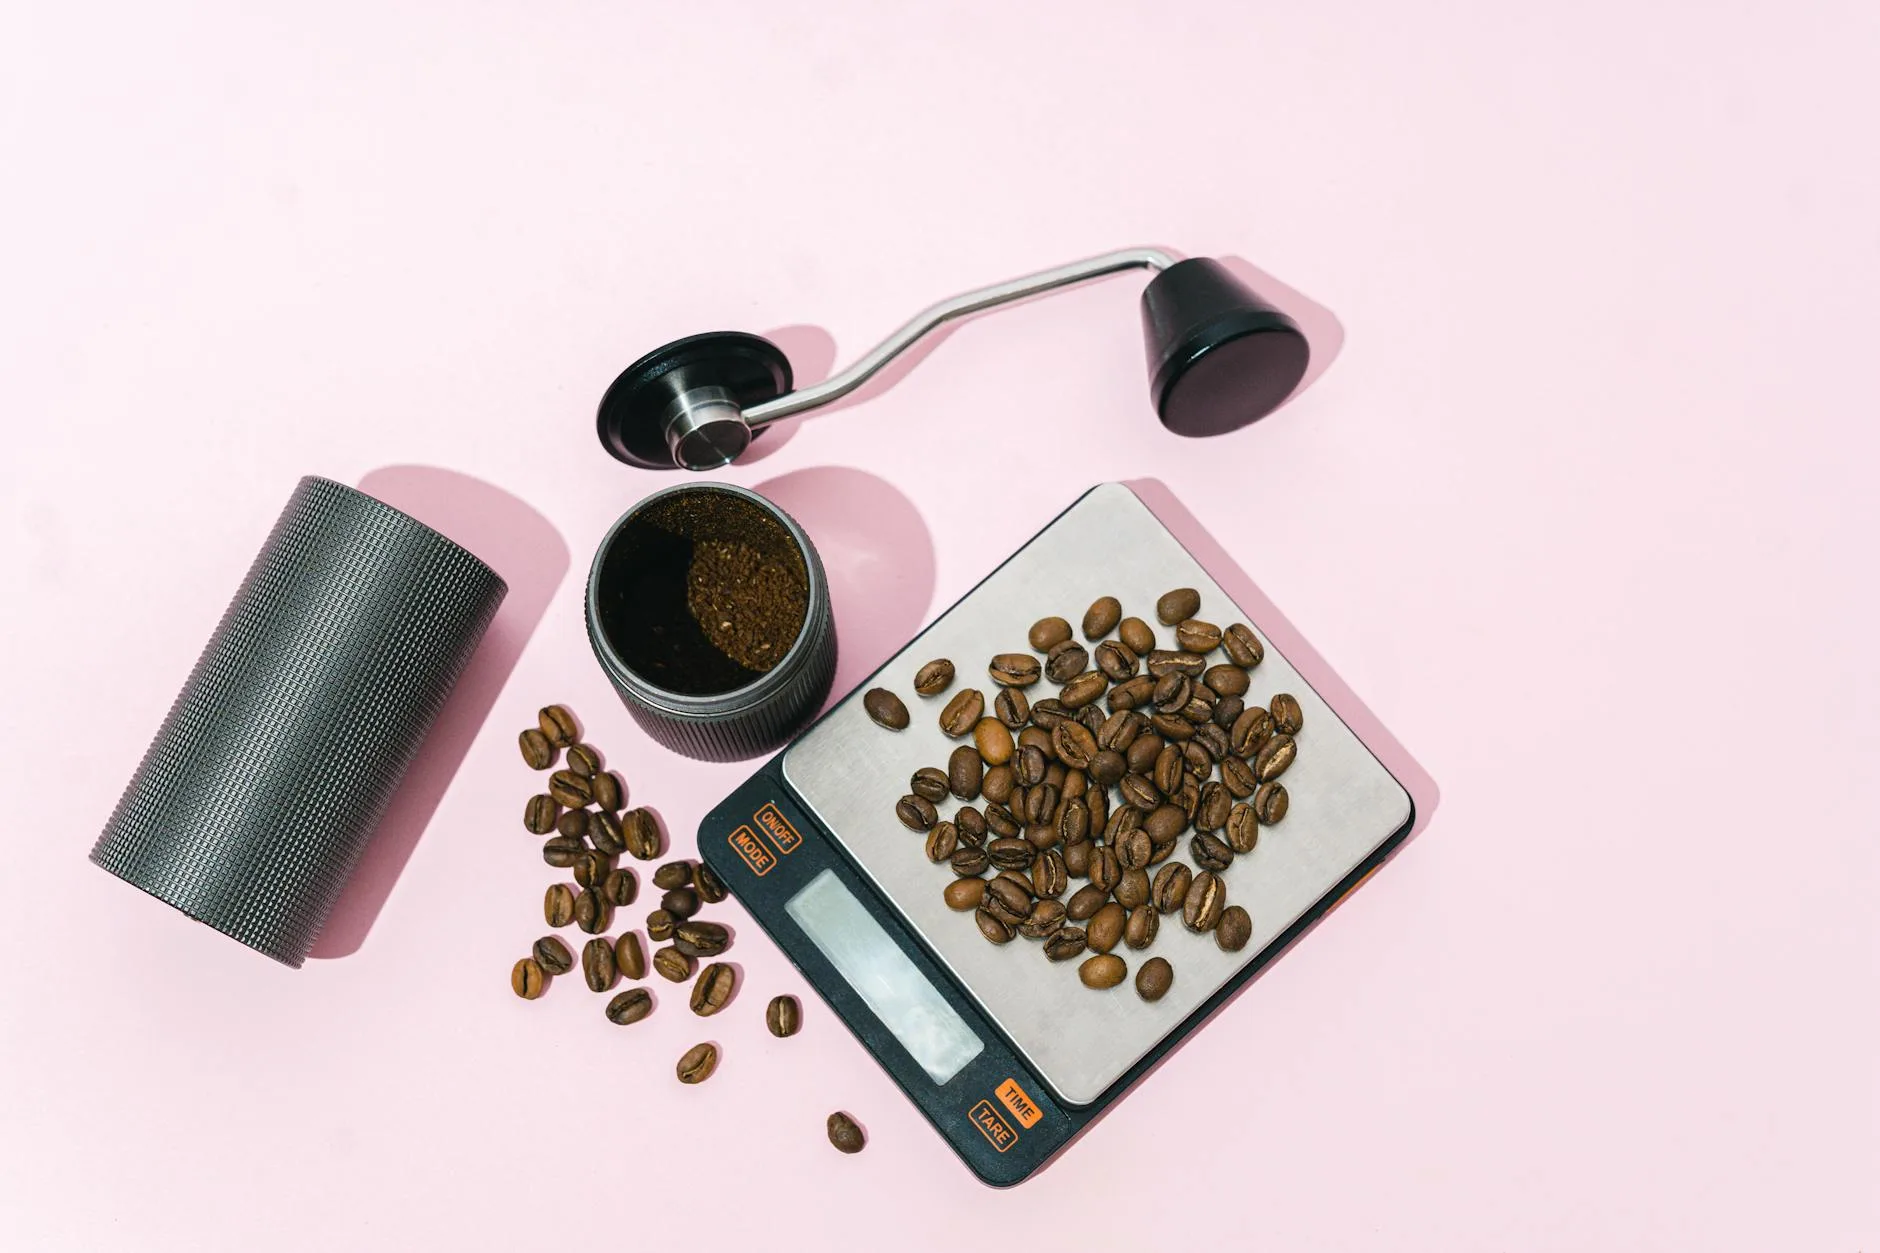
- A coffee grinder — pre-ground coffee goes stale in days. A hand grinder or decent electric burr grinder makes the biggest single improvement to your cup. Budget: £30 for a Timemore C2, £100+ for electric
- Digital scales — the included scoop is a rough guide but coffee weight varies by bean density. A simple 0.1g kitchen scale for about £10-15 removes the guesswork
- A kettle with temperature control — or at minimum, a regular kettle and a thermometer. Water temperature matters more than most people think
Nice to Have
- A gooseneck kettle — not essential for AeroPress (unlike pour-over) but gives you more control over pouring speed. Our gooseneck kettle guide covers the options
- Metal filter — reusable alternative to paper filters that lets more oils through. Gives a fuller, French press-style body
- Fellow Prismo — a pressure-actuated valve that replaces the filter cap, creating more espresso-like results. About £30
The Standard Method: Your First Recipe
This is the official AeroPress method — brew right-side up, straight into your mug.
What You Need
- 15g coffee ground medium-fine (slightly finer than table salt)
- 200ml water at 85°C (not boiling — let the kettle sit for 30-60 seconds after clicking off)
- AeroPress with a paper filter, rinsed with hot water
Step by Step
- Place a paper filter in the cap and rinse it with hot water over your mug. This removes papery taste and preheats the mug. Discard the rinse water.
- Attach the filter cap to the chamber. Set the chamber on your mug, filter-side down.
- Add 15g of ground coffee to the chamber.
- Start a timer. Pour 200ml of 85°C water steadily over 10 seconds, making sure all the grounds are wet.
- Stir gently 3-4 times with the included paddle or a spoon.
- Insert the plunger just into the top of the chamber to create a seal (this stops the coffee dripping through). Wait until 1:30 on the timer.
- Press the plunger down slowly and steadily. Aim for 20-30 seconds of pressing time. Stop when you hear a hissing sound — that’s air pushing through the last of the water.
- Remove the AeroPress from your mug. You’ve got about 200ml of concentrated coffee.
The whole process takes under 2 minutes. The result should be clean, smooth, and slightly sweet. If it tastes sour, your grind is too coarse or your water too cool. If it’s bitter, grind coarser or use slightly cooler water.
The Inverted Method Explained
The inverted method flips the AeroPress upside down during brewing to prevent any coffee dripping through before you’re ready. It’s the preferred technique for most specialty coffee enthusiasts and competition brewers. If you are exploring this area, our guide on Pour Over vs French Press vs AeroPress: Brew Method Guide covers the essentials.
Why Invert
In the standard method, coffee starts dripping through the filter as soon as water hits the grounds. This means your immersion time isn’t fully controlled — some water passes through in 30 seconds, some steeps for the full brew time. The inverted method keeps all the water in contact with all the grounds for the entire steep.
How to Do It
- Insert the plunger into the chamber about 1cm (just enough to seal). Flip the whole thing upside down so the plunger is on the bottom.
- Add 15g of ground coffee.
- Pour 200ml of water at 85-90°C. Stir 3-4 times.
- Let it steep for 1:30 to 2:00.
- Place the filter cap (with a rinsed paper filter) on top and screw it on firmly.
- Put your mug upside down on top of the filter cap. In one confident motion, flip both the AeroPress and mug together. Do this over the sink the first few times — spills happen.
- Press down slowly for 20-30 seconds.
The inverted method produces a slightly fuller, more flavourful cup because every ground gets the full steep time. The trade-off is the flip — it takes practice and there’s a real risk of hot coffee going everywhere if the seal isn’t tight.
After a few dozen inverted brews, we’ve settled on this as our daily method. The flip becomes second nature after a week.
AeroPress Recipes for Different Tastes
The beauty of the AeroPress is how much you can adjust with small changes. Here are four tried-and-tested recipes:
Light and Bright (Best for Light Roasts)
- Coffee: 14g, ground medium
- Water: 220ml at 92°C
- Method: Standard. Pour, stir twice, steep 2:00, press 30 seconds
- Result: Tea-like clarity with bright acidity. Highlights floral and fruity notes in Ethiopian or Kenyan beans
Rich and Bold (Best for Medium-Dark Roasts)
- Coffee: 17g, ground medium-fine
- Water: 200ml at 83°C
- Method: Inverted. Pour, stir 4 times, steep 1:30, press 20 seconds
- Result: Heavy body, chocolate and caramel notes, low acidity. Works brilliantly with Brazilian or Colombian beans
Espresso-Style Concentrate
- Coffee: 18g, ground fine (just coarser than espresso)
- Water: 90ml at 88°C
- Method: Inverted. Pour, stir 5 times, steep 1:00, press firmly for 30 seconds
- Result: A thick, concentrated shot. Dilute with hot water for an Americano or add steamed milk for a latte. Not true espresso, but closer than any other manual brewer gets
Cold Brew Concentrate (Overnight)
- Coffee: 25g, ground coarse
- Water: 200ml at room temperature
- Method: Inverted. Stir, cover with cling film, leave in the fridge for 12-18 hours. Press in the morning
- Result: Smooth, low-acid concentrate. Dilute 1:1 with cold water or milk. Makes 2 glasses of iced coffee
Water Temperature and Why It Matters
Water temperature is the second biggest variable after grind size, and most people get it wrong by using boiling water straight from the kettle.
The Science (Simplified)
Hotter water extracts faster. With boiling water (100°C) and a fine grind, you’ll over-extract in seconds — pulling out bitter, ashy compounds that ruin the cup. Cooler water extracts more slowly and selectively, pulling sweetness and acidity before the bitter compounds come through.
Temperature Guidelines by Roast
- Light roast: 90-95°C. Light roasts are denser and need more heat to extract properly
- Medium roast: 85-90°C. The sweet spot for most beans
- Dark roast: 80-85°C. Dark roasts extract easily and turn bitter fast with hot water
How to Hit Your Target Temperature
If you don’t have a temperature-controlled kettle, boil the kettle and wait:
- 30 seconds off the boil ≈ 92-94°C
- 1 minute ≈ 88-90°C
- 2 minutes ≈ 83-85°C
These are rough guides — ambient temperature affects cooling rate. A £15 kitchen thermometer removes the guesswork.
Grind Size: The Single Biggest Variable
Get the grind right and your AeroPress coffee will be excellent regardless of recipe. Get it wrong and no amount of technique fixes it.
What “Medium-Fine” Actually Means
The standard AeroPress recommendation is medium-fine — finer than drip coffee but coarser than espresso. In practical terms: slightly finer than granulated sugar, noticeably coarser than flour. If you rub it between your fingers, it should feel gritty but not powdery.
Grind Size Effects
- Too coarse: Water flows through too fast, under-extracts. The cup tastes sour, thin, and watery
- Too fine: Water can’t push through — you’ll struggle to press the plunger. The cup tastes bitter and astringent
- Just right: Moderate resistance on the plunger (about 20-30 seconds to fully press). The cup is sweet, clean, balanced
Grinder Recommendations
- Budget: Timemore C2 hand grinder (about £50) — outstanding quality for the price. We’ve used one daily for over a year
- Mid-range: 1Zpresso JX (about £100) — faster and more consistent than the Timemore
- Electric budget: Baratza Encore (about £130) — the default recommendation for a reason
- Electric premium: Niche Zero or DF64 (£250+) — overkill for AeroPress alone, but if you also make espresso
Our coffee grind sizes guide has visual references for every brew method.
How to Dial In Your AeroPress
“Dialling in” means adjusting your recipe based on how the coffee tastes. It’s iterative — brew, taste, adjust one variable, brew again.
The Adjustment Order
When your cup isn’t right, change variables in this order:
- Grind size first — this has the biggest impact. Sour? Go finer. Bitter? Go coarser.
- Water temperature second — if grind adjustments alone aren’t enough, try 3-5°C hotter (for sour) or cooler (for bitter).
- Steep time third — longer steeps extract more. If you’re at a good grind and temperature but want more flavour, add 15-30 seconds.
- Coffee dose last — more coffee intensifies everything. Only adjust this when the flavour profile is right but the strength isn’t.
The Tasting Framework
- Sour/acidic/sharp → under-extracted. Grind finer, increase temperature, or steep longer
- Bitter/harsh/dry → over-extracted. Grind coarser, decrease temperature, or steep shorter
- Weak/watery → increase dose or decrease water volume
- Strong/overwhelming → decrease dose or increase water volume
- Balanced, sweet, clean → you’ve nailed it. Write down exactly what you did
Common AeroPress Mistakes
Using Boiling Water
This is the number one mistake. Boiling water over-extracts instantly, especially with medium and dark roasts. Always let the kettle cool for at least 30 seconds.
Pressing Too Hard
The plunger should meet moderate resistance. If you’re white-knuckling it, your grind is too fine. If it plunges with zero resistance, your grind is too coarse. Think “steady pressure” not “maximum force.”
Not Weighing Coffee
The included scoop holds roughly 11-14g depending on how you fill it and the bean density. That’s a 25% variance, which matters enormously. A £10 digital scale fixes this permanently.
Reusing Paper Filters
You can rinse and reuse AeroPress filters 2-3 times — they’re surprisingly durable. But beyond that they deteriorate, flow rates change, and old coffee oils go rancid. A pack of 350 filters costs about £6. Just use a fresh one.
Ignoring Freshness
Coffee peaks in flavour 7-21 days after roasting. Pre-ground supermarket coffee was ground weeks or months ago. The single biggest upgrade to your AeroPress routine is buying whole beans from a UK roaster (here’s how to choose) and grinding them fresh each morning.
AeroPress vs Other Brew Methods
vs French Press
French press gives a heavier, oilier cup with more sediment. AeroPress is cleaner and less gritty, brews faster (2 minutes vs 4), and is far easier to clean. The French press wins on volume — it makes 3-4 cups at once. For a single cup, AeroPress beats it every time in our experience.
vs Pour-Over (V60/Chemex)
Pour-over produces a crystal-clear, delicate cup that highlights subtle flavours. It’s also harder to do consistently — pour rate, spiral pattern, and timing all matter. AeroPress is more forgiving and produces a slightly fuller body. If you want simplicity with great results, AeroPress. If you want maximum clarity and don’t mind the technique curve, pour-over.
vs Espresso Machine
Not a fair comparison — a proper espresso machine costs £300-3,000 and produces 9 bars of pressure for a 25-second extraction. AeroPress can make an espresso-style concentrate, but it’s not espresso. If you want real crema, real milk-based drinks, and the ritual of pulling shots, you need a machine. If you want excellent black coffee with minimal fuss, the AeroPress is hard to beat.
vs Moka Pot
The Moka pot produces a strong, slightly bitter coffee that Italians swear by. It’s stovetop, makes 2-6 cups, and costs about £15-30. AeroPress is milder, smoother, and more versatile. The Moka pot wins on nostalgia and volume; the AeroPress wins on flavour control and cleanup speed.
Cleaning and Maintenance
One of the AeroPress’s biggest advantages: cleanup takes about 15 seconds.
After Every Brew
- Remove the filter cap.
- Push the plunger all the way through to eject the puck of compressed grounds straight into the bin or compost.
- Rinse the plunger and chamber under the tap.
- Done.
Weekly
Give the rubber seal on the plunger a wipe with a damp cloth. If your water is hard (much of southern England), you might notice mineral buildup inside the chamber — a quick rinse with diluted white vinegar sorts it out.
When to Replace the Seal
The plunger seal is the only part that wears out. It typically lasts 2-3 years with daily use before it loses its grip and fails to create proper pressure. Replacement seals are about £5 from AeroPress directly or Amazon UK.
AeroPress Accessories Worth Buying
- Fellow Prismo (about £30) — pressure-actuated valve and metal filter. Creates stronger, espresso-style shots. The single best accessory for AeroPress
- Metal filter (about £8-12) — reusable, lets oils through for a fuller cup. Eliminates the need for paper filters
- AeroPress filter holder (about £5) — keeps your paper filters dry and flat. Minor but useful
- Travel case — if you didn’t buy the AeroPress Go, a hard-shell case (about £10-15) protects it in luggage
- Organiser stand — keeps the AeroPress, filters, and stirrer tidy on your counter. Loads of 3D-printed options online, or Amazon sells purpose-built ones for about £15
Frequently Asked Questions
How much coffee does an AeroPress make? The standard AeroPress makes about 200-250ml per brew — roughly one large mug. The XL version doubles that. You can make a stronger concentrate with less water and dilute it for two smaller cups, but it’s fundamentally a single-serve brewer.
Can you make iced coffee with an AeroPress? Yes, and it’s one of the best methods. Brew a concentrate using 18g coffee and 100ml of hot water, then pour directly over a glass full of ice. The ice dilutes and cools it instantly. For cold brew, use room temperature water, steep overnight inverted, and press in the morning.
How long do AeroPress paper filters last? A single paper filter can be rinsed and reused 2-3 times before flow rate changes noticeably. A pack of 350 costs about £6, so even using a fresh one daily that’s less than 2p per cup. Metal filters are reusable indefinitely but produce a different cup style.
Is AeroPress coffee stronger than filter coffee? By default, AeroPress produces a more concentrated cup than drip filter because the ratio is typically 1:13 (coffee:water) vs 1:16 for drip. The actual caffeine content is similar — concentration affects flavour intensity more than caffeine extraction.
What’s the best coffee for AeroPress? Medium roasts from single-origin beans tend to shine in the AeroPress. Look for UK roasters like Square Mile, Hasbean, Origin, or Assembly. Buy whole beans roasted within the last 3 weeks for the best flavour. Supermarket beans work in a pinch, but fresh-roasted specialty beans are a different experience entirely.